Merry Christmas all :D
Just thought I'd post a progress update.TABLE
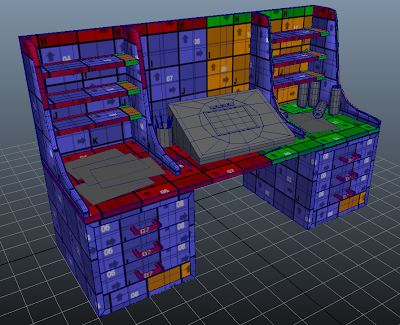
Here's where I am with my table, the actual table is completely modelled an UV'ed (I'm have a think about the shelves because I feel like they look too empty but I'm having difficulty coming up with additional objects that are simple to fit my time constraints but hard enough not to look shoddy, also the shelves are an odd proportion which means if I make a books or DVD stack it wont quite fit in the shelves if they were in proportion to the other objects).
Other than the shelf issue I'm really happy with how this turned out, I wanted to make it look like a cluttered animators desk (2D) and I think I've done it.
As a student I've noticed that energy drink cans build a staple of my desk fauna, whilst the ring pulls can differ slightly I've just modelled a relentless Can for simplicities sake, but in order to make it looks like more than just a duplication I'm gonna texture them with different flavours or brands to add variety.
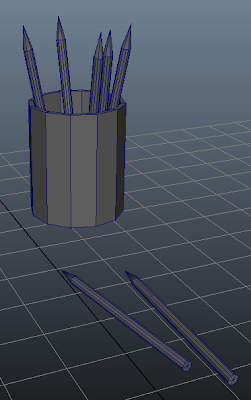
Here's a shot of the Pen pot (not much to say bout it its kind of standard :/. I may apply a nice bump and make it look metallic to jazz it up).
One of me favourite elements is the Lightbox though. I've modelled it hollow because I'm thinking of putting a soft light inside of it and making the "glass plate" an opaque off white. I'm hoping that it'll look as if the lightbox is on and create some nice lighting effects.
Overall I still need to UV the Pen Pot, Pencils, Lightbox and the Papers on the desk. I didn't take a screenshot of the papers because their just planes that I've latticed slightly to make them less flat, when I texture them I intend to us my own sketch's from the Visual Narrative project as textures and on the right side of the desk I've knocked over a can because I'm going to Photoshop a drink spill onto one of my drawing to tie the image together a bit.
TRON BIKE
I'm very happy with my progress on the Tron Bike, I've done extensive work re-modelling the Chassis, I modelled so that the chassis hugs the wheels preventing the viewer from seeing inside the model from a funny angle and made some slight adjustments to the overall shape in order to get the wheels to right size.
Besides the slight size adjustment I've just added extra edgeloops to sharpen the wheels where necessary, I am slightly worried that when I duplicate and smooth the wheel it will change shape meaning I will have to re-adjust the chassis but ill cross that bridge when it comes to it.
This was a fairly simple items to model but again I have a feeling that once I've smoothed the wheel I'll have to adjust it again.
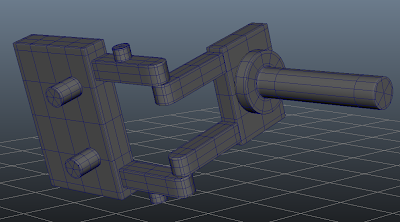
I'm happy with how this handle has turned out but I know its going to be tedious to UV because its made of loads of simpler objects. I considered making it into one item but I think that if I did that then it'd make it quite complicated and I'm not sure how id go about UV'ing it. and since we don't need to texture the items I think this is the fastest way to get it done nicely.
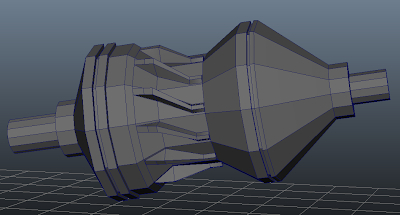
Finally I had a bit of an issue making the Engine because even though the base was quite simple, it took me long to understand the shape of the spokes revolving round the middle.
Both of my refs differ quite largely (this one and this one) so I drew it out and made a mix of the two but I don't think this will be much of an issue as everyone engines differ anyway.
I still need to model the light ribbons (just 2d planes that will sit on the chassis and wheels) and I may model the light disk that sits on the top of the bike if I have time. I still need to UV everything but thankfully this bike can be done mostly with coloured Mia X Material shader's and a couple of bump maps (for the handle, footpad, and tire tread).
TOYSince we get to choose our Toy this year I've picked 3 of varying difficulty.
Robot
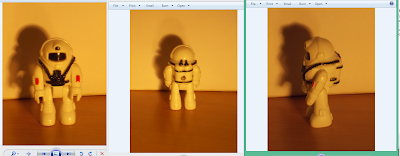
This is my safety choice because I can foresee not having enough time and id rather hand in something bordering to simple than hand in later or even worse, have nothing to hand in.
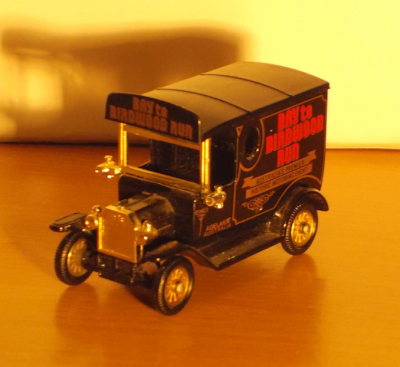
Car
This is my second choice because it has several different texture (the roof is a matt plastic/metal, the body isa more reflective metal and the wheel are just plastic). and it also give me an opportunity for some nice bump maps on the wheel, Grill and there is a made in England imprint on the underside of the body that can be achieved with a bump map.
The Girl
In my opinion she is the most difficult because I'm am basically modelling a human being but I had an extra pound and thought why not.
The plus is that the model isn't too simple, their are plenty of little bits to model that don't look too difficult. but that weird looking stars gem will be an issue since I have no idea what material it is. its clearly a plastic but the star design looks as if its suspended within the plastic and its got a sort of honey like way of play with the light that I cant wrap my head around. I suppose if I did do it I might think about making it as a translucent dome of orange plastic with a fairly flat but still 3d star pattern under it.
Unfortunately my family have taken a shine to this model so I've given it a shot to see if i could attempt this is where I've gotten too.
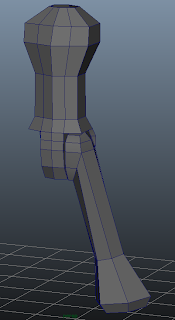
All i need to do to finish the basic shape is; finish the leg by adding her boot and a knee, duplicate and mirror it for the other leg, model the arm, chest and the head (which is the bit I'm dreading).
ill come back to it later on and re-evaluate how much time I have can spare but I think if I cant do it then ill have to go with the robot.
So yeah that's about it, gunna try to Texture my shark next and hopefully attempt a render.
Aside from all that I wish everyone a merry Christmas :)


